How to Export a Table from SQL Server to an Excel Spreadsheet with the SQL Sever
Import and Export Wizard
Export a SQL database table to an Excel spreadsheet in nine steps.
Using the steps outlined on this page, you can easily export a table from Microsoft
SQL Server to an Excel Spreadsheet with the SQL Server Import and Export Wizard.
You can use the Wizard in the SQL Server Standard, Enterprise, Developer or Evaluation
editions.
1. Prepare an Excel spreadsheet to receive the SQL table data
- First, prepare an Excel spreadsheet to receive the data from the SQL table by adding
the exact headings that are in the table to the top row of the spreadsheet
(see the two screenshots below).
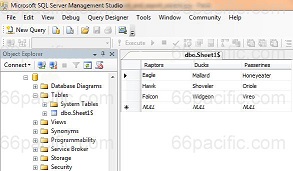
The target Excel spreadsheet with SQL table headings added

The source table, dbo.Sheet1$, in Microsoft SQL Server Management Studio
2. Start the SQL Import and Export Wizard
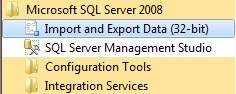
- Next, in Windows, start the Import and Export Wizard at Start / All
Programs / Microsoft SQL Server 2008/ Import and Export Data.
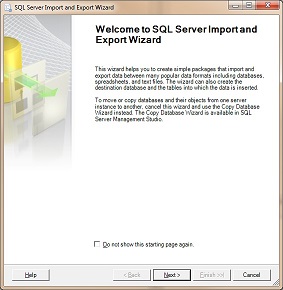
- The Welcome page appears. Click Next.
SQL Import and Export Wizard in the Windows Start menu
3. Chose your SQL table as the Data Source
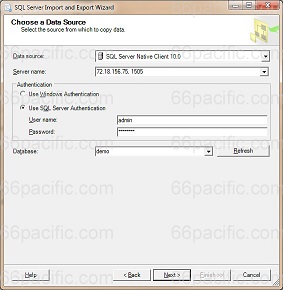
- In the Data Source dropdown list of the Choose a Data Source page,
accept the default SQL Server Native Client 10.0.
- In the Server name dropdown list, enter the name of the server. The example
is a remote server, so the IP address and port of the server were specified.
- Chose the Authentication type. The example is a remote server, so SQL Server
authentication, with a user name and password, is required.
- In the Database dropdown list, select or type the name of the database.
- Click Next.
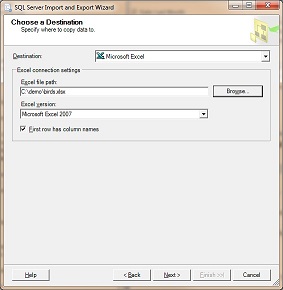
4. Chose your Excel spreadsheet as the Destination
- In the Destination dropdown of the Choose a Destination page, select
Microsoft Excel.
- In the Excel file path box, specify the file path to the target Excel spreadsheet.
- Select the the version in the Excel version dropdown.
- Make sure that First row has column names is checked.
- Click Next.
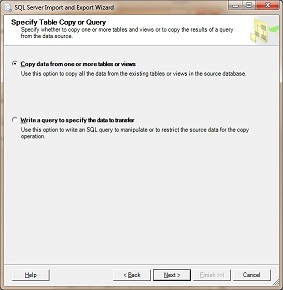
5. Specify how to copy the data
- The default option, Copy data from one or more tables or views, works for
this example.
- Click Next.
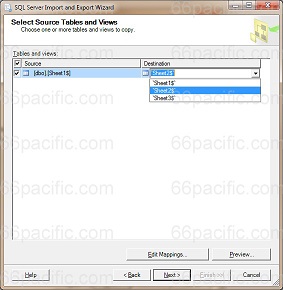
6. Select the source tables and views
- The default settings as shown work in this example.
- In the Destination column, specify the name of the Excel spreadsheet. In
step 1, Sheet2 was used, so that sheet is shown selected here.
- Click Preview to see how your data will appear in the destination spreadsheet.
- You can click Edit Mappings to change how your data is assigned at the destination
spreadsheet, but it shouldn't be necessary in this example since you entered
the data into the Excel spreadsheet yourself.
- Click Next.
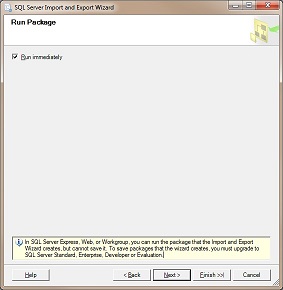
7. Run the "Package"
The following message appears at the bottom of the Run Package page: In SQL
Server Express, Web, or Workgroup, you can run the package that the Import and Export
Wizard creates, but cannot save it. To save packages that the wizard creates, you
must upgrade to SQL Server Standard, Enterprise, Developer or Evaluation.
A "package" is all of the settings that your have configured so far. In
the commercial versions of SQL Server, you can save the package for reuse so you
don't have to enter all of the settings the next time you run the wizard. In
the Express (free) version of Microsoft SQL Server 2008 Management Studio,
you must re-enter all of the settings every time you run the SQL Server Import and
Export wizard.
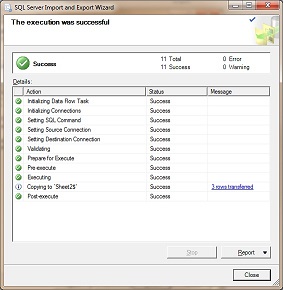
8. Verify that the package executed successfuly
- Click Report to view useful information about the data transfer process.
- If you get an error saying that the number of rows is not correct, verify that the
headings in the Excel spreadsheet match the SQL table exactly, as
shown in step 1.
- Click Close.
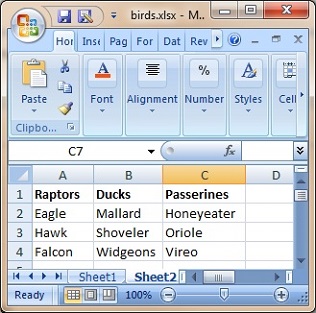
9. View the spreadsheet with the imported table rows in Excel
- View the spreadsheet with the added data rows.
The new spreadsheet, Sheet2, in Microsoft Excel.
You can also use the Import and Export Wizard to
import data from an Excel spreadsheet to a table in SQL Server.
Please send any suggestions or comments about this page to feedback at 66pacific.com.